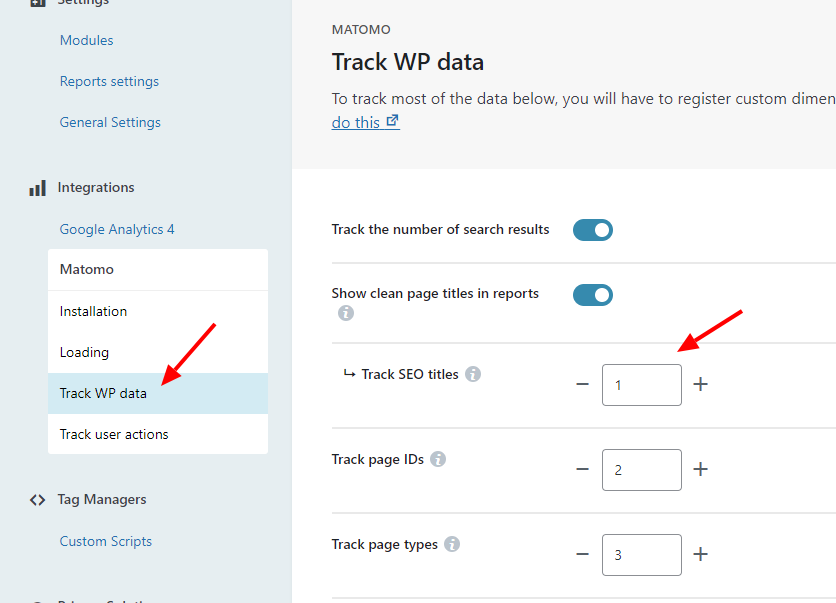
How to track WP data in Matomo by registering custom dimensions
Attention! By default, users of the on-premise installation can track up to 5 dimensions with scope “Action” and 5 of scope “Visit” (this can be increased to 50 each) and cloud users can track up to 30 dimensions (15/15) (this cannot be changed).
WP Full Picture lets you track wide array of data from your WordPress installation.
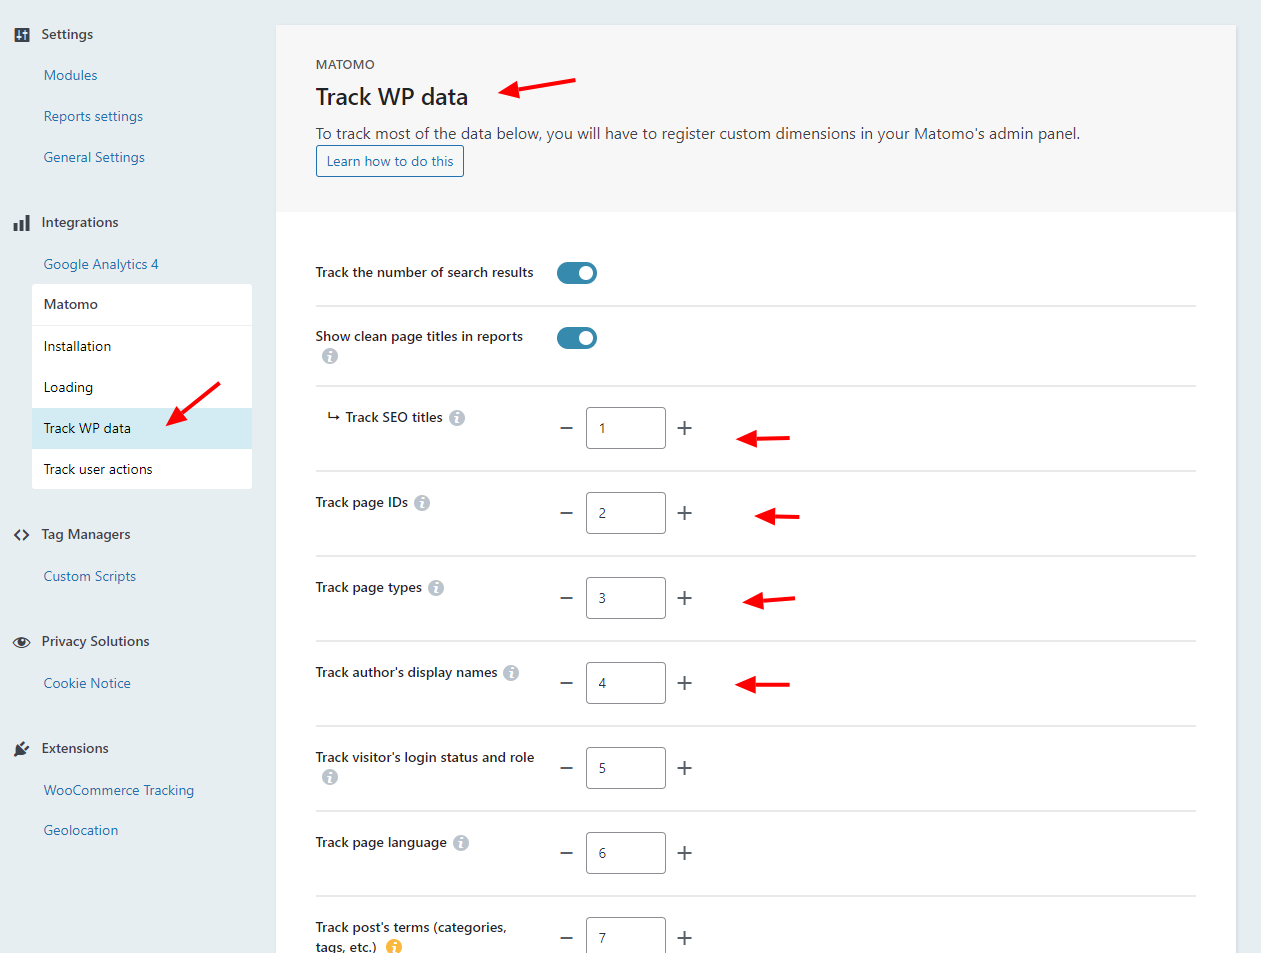
However, to see this data in Matomo reports, you need to enter index numbers in the fields in the form with settings.
Where to take this index number from?
You will get it after you register a custom dimension in Matomo admin panel. This article explains, how to do this.
How to register a custom dimension in Matomo
Step 1 – Go to Matomo’s Custom Dimensions settings
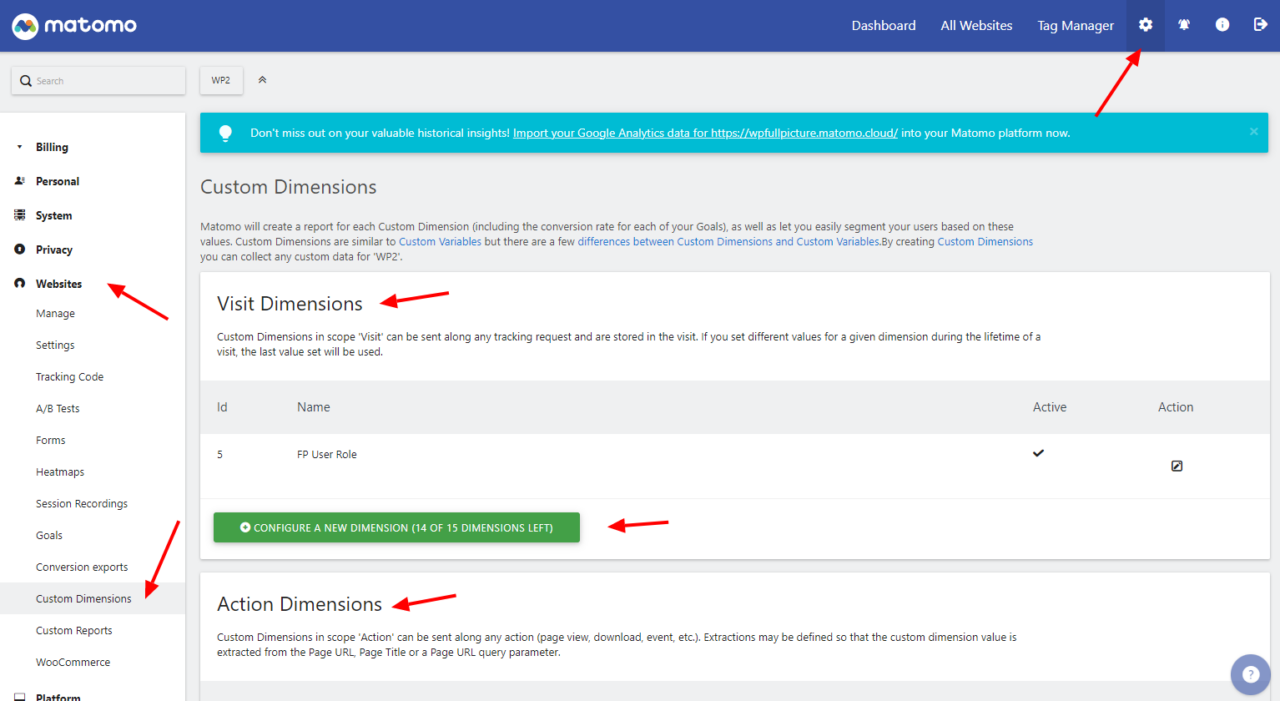
- Visit Matomo dashboard
- Go to the Administration area (cog icon in the top menu)
- Open “websites” > “custom dimensions”
- Add your custom dimensions either in the “Visit” or “Action” section (depending on the information provided in the Matomo’s settings panel in WP Full Picture’s)
Step 2 – Add a custom dimension
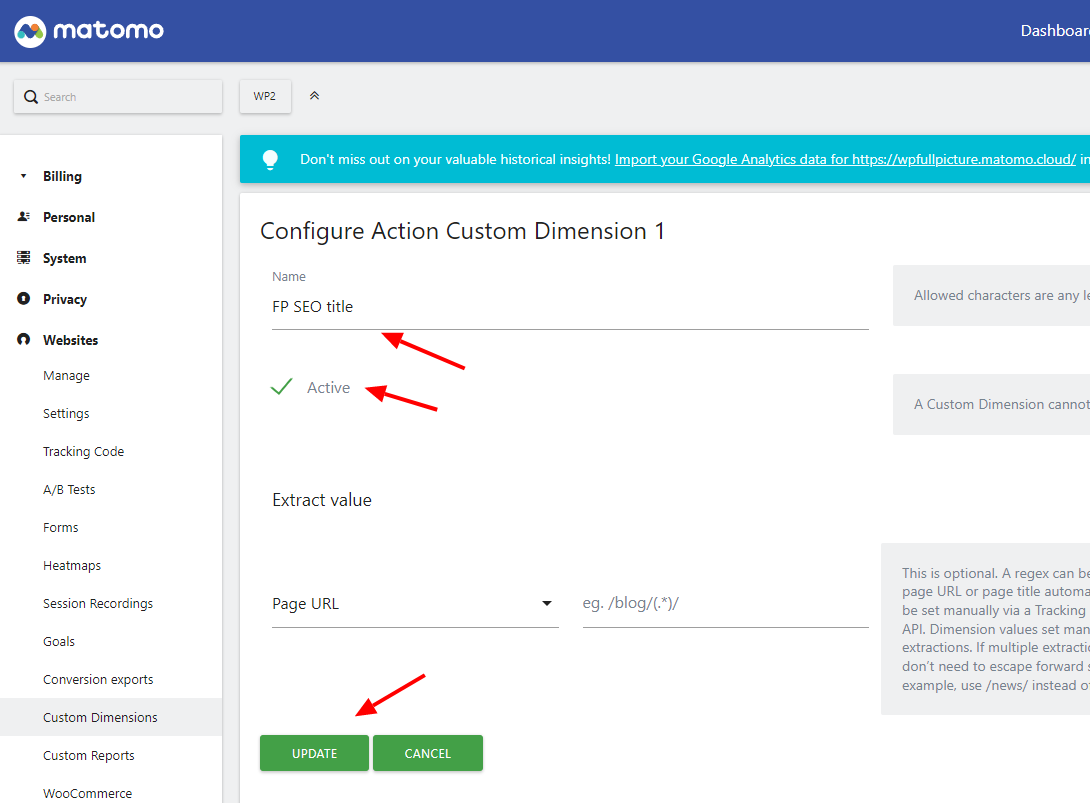
- Give a new dimension a name and click “active” but do not set “extract value”
- Save changes
Step 3 – Find the dimension’s index number
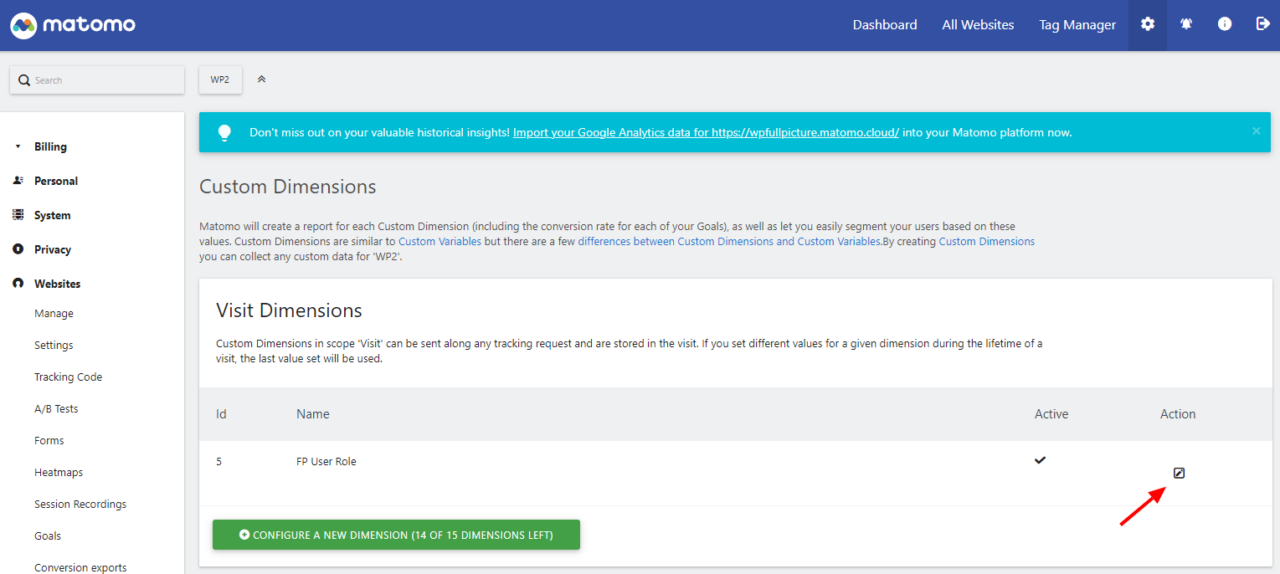
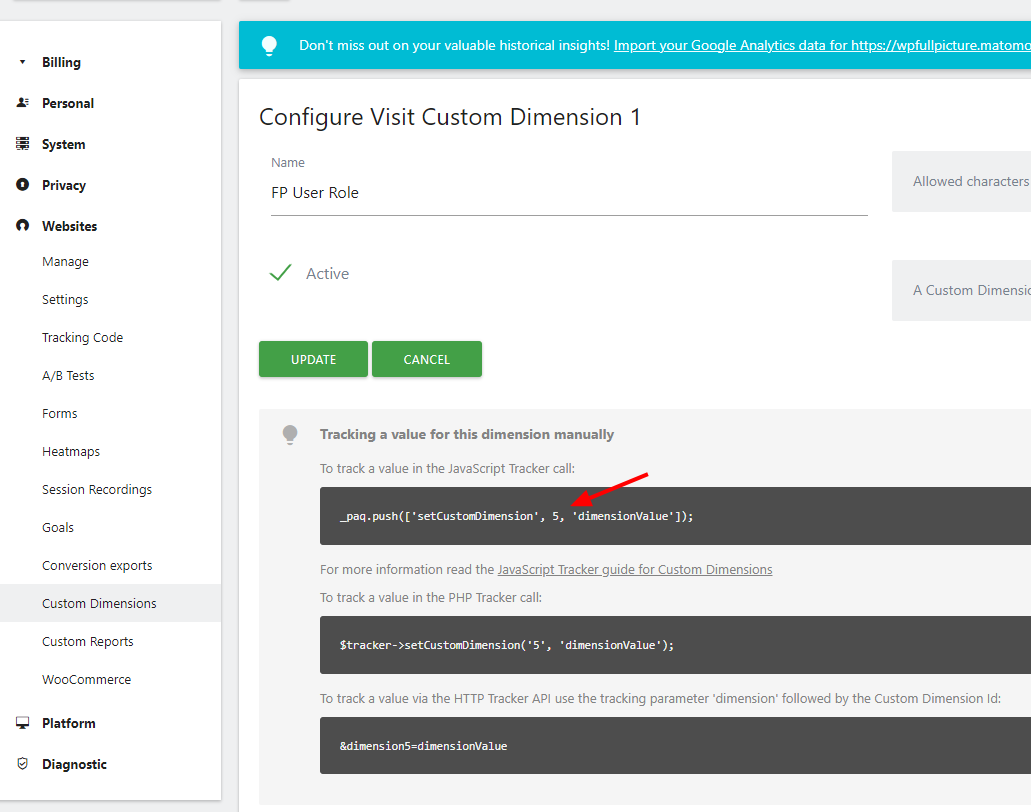
- Click an icon to edit the custom dimension you have just created
- Scroll down the page and look for a piece of code with information with the ID of your dimension, e.g.
_paq.push(['setCustomDimension', 1, 'dimensionValue']); - Paste the ID into the correct settings field in the WP Full Picture settings
