Custom triggers let you:
- track non-standard events (custom events), e.g. when someone visits a product page from a specific ad campaign, and
- measure the quality of your traffic sources (with visitor scoring).
How to use custom triggers
To use custom triggers:
- Enable the “Custom triggers” module,
- set up triggers,
- and use them to trigger “custom events”.
How to set up custom triggers
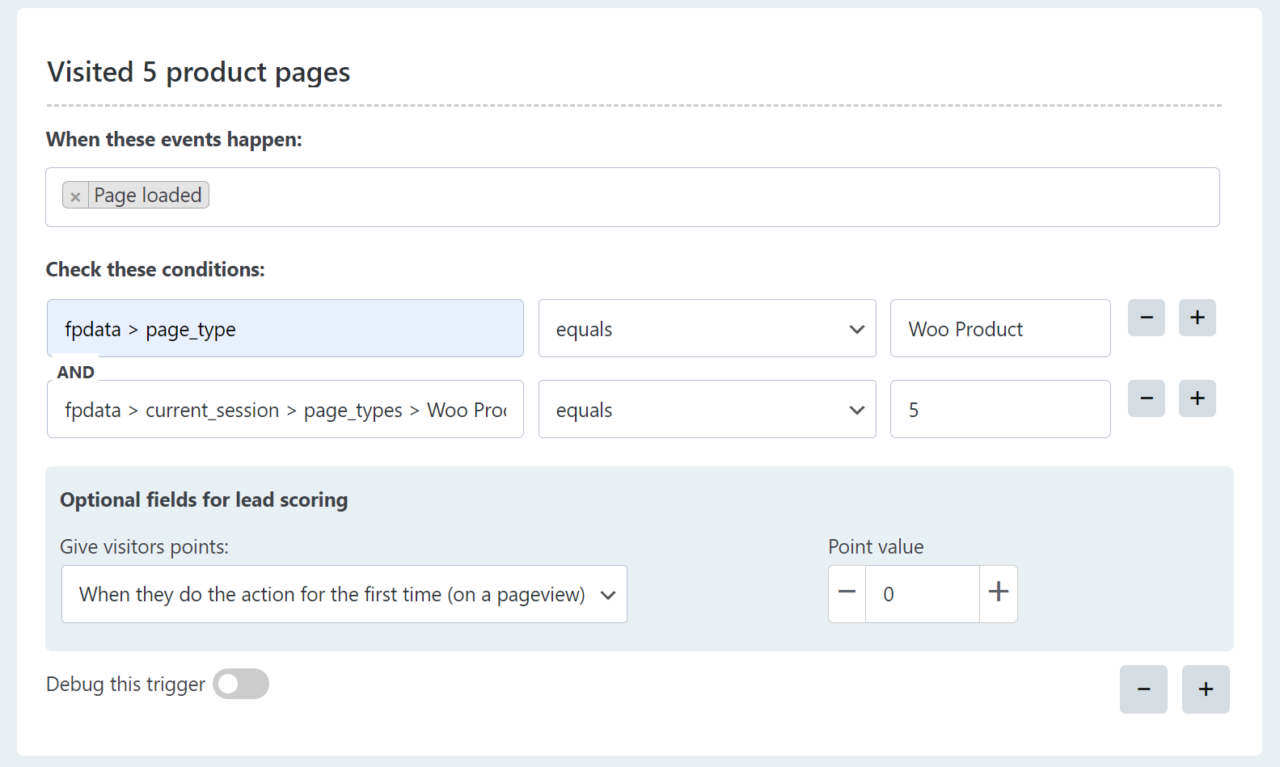
Enable the “Custom triggers” module and set triggers in the sections that look like the one below.

The most important fields are in the “Conditions” section. They can look like this:

In the first field, you can add paths to values of the fpdata object, but these can be any other JavaScript variables that can be accessed through the “window” object.
Use “>” symbol to indicate that a value is inside another value. For example, data located at window.fpdata.page_id should be entered as fpdata > page_id.
How to test the trigger
To test the trigger, you simply need to:
- switch the “debug this trigger” option of custom triggers you want to test
- save the changes on the page
- open your website in a new tab
- take actions that you specified in the conditions
When the conditions are met, you will see a new entry in the browsers console.

How to use custom triggers to fire custom events
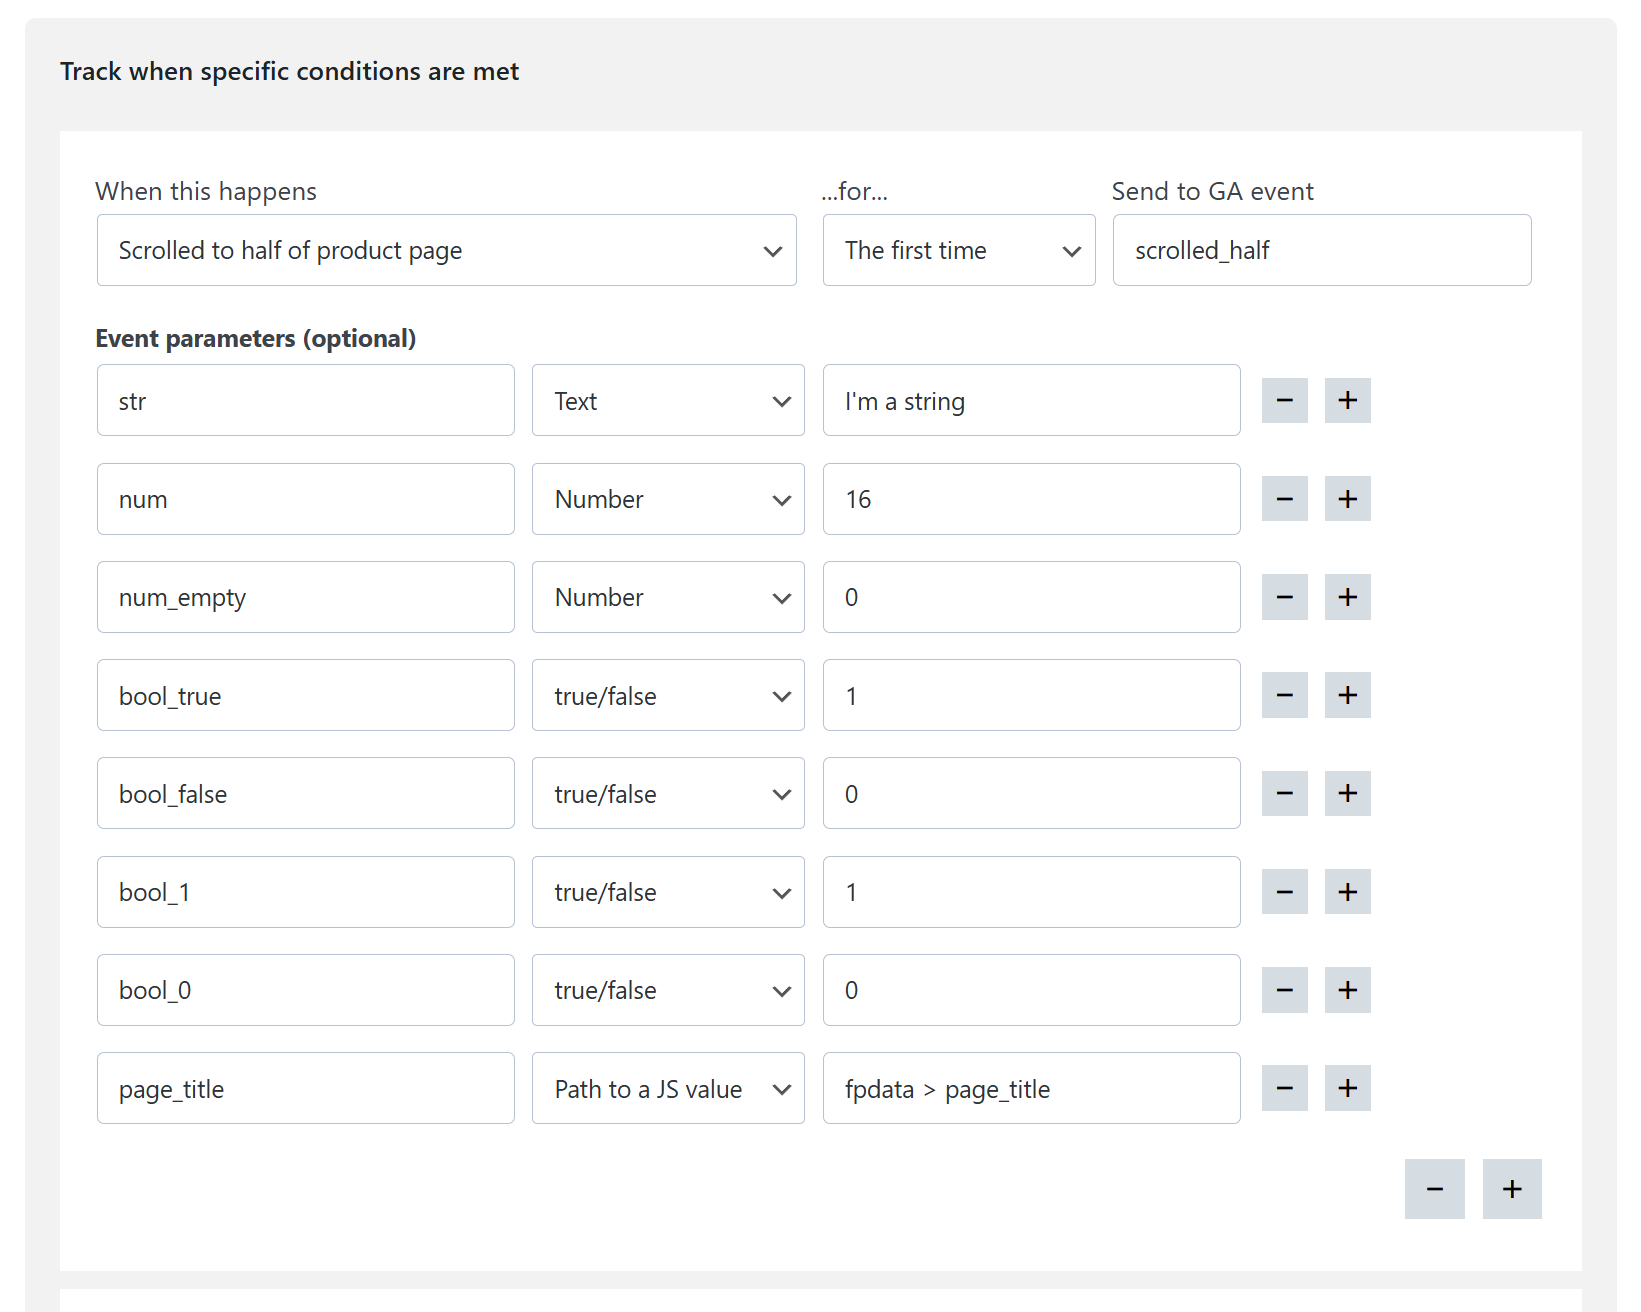
All the custom triggers you set up, will be available to choose in the “Custom events” settings of tools like Google Analytics, Meta Pixel and others that support it.
In Google Analytics, setting up custom events l;ooks like this.

